Blog

Installing Modern Garage Doors

DIY vs. Pro: Installing Modern Garage Doors for Your Home

Modern garage doors are essential for protecting your vehicles and valuables while also enhancing the curb appeal and value of your property.

If you're considering upgrading to a modern garage door, one crucial decision you'll face is whether to install it yourself or hire professionals. Both options have their merits, but understanding the factors involved can help you make the right choice for your needs.

Modern Garage Doors

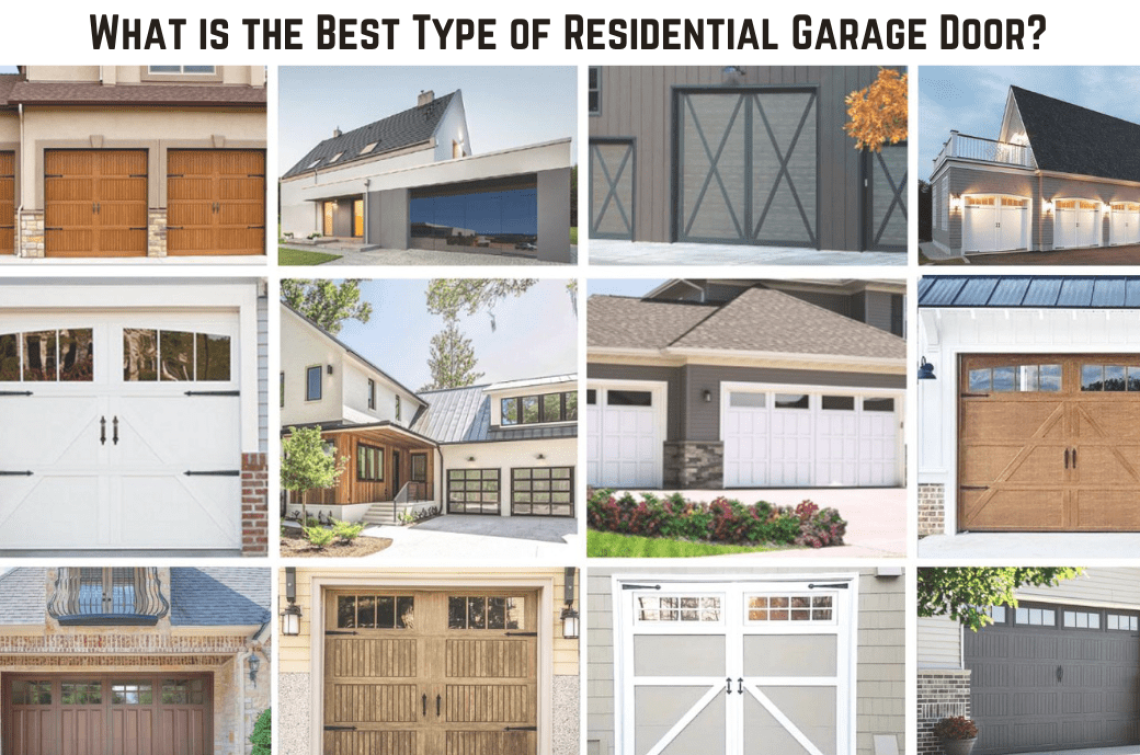
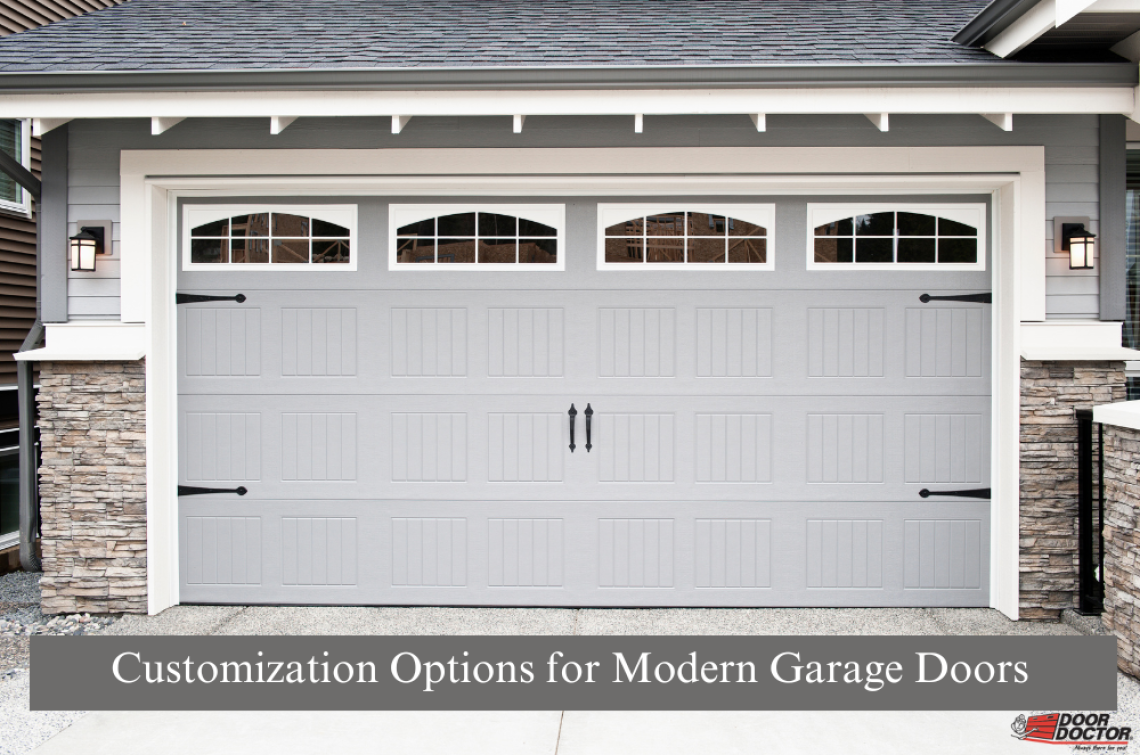
Modern garage doors come in a variety of sleek and stylish options, from glass and aluminum panels to wood finishes with hidden hardware. They boast clean lines, minimalist designs, and innovative features like automatic openers with smartphone integration. Here are some additional benefits to consider if you are thinking about installing a garage door with a modern design.

Benefits of Modern Garage Door

  • Durability: Today’s garage doors are often crafted from high-quality materials like steel or composite wood, ensuring longevity and weather resistance.
  • Energy Efficiency: Insulated panels can significantly improve your garage's thermal performance, potentially saving energy bills.
  • Security: Modern doors often come with advanced security features like reinforced construction and motion sensors, enhancing your home's overall protection.
  • Natural Light: Glass panels in modern doors can brighten your garage space and create a more inviting feel.

DIY Installation

For many homeowners, the allure of saving money by tackling a DIY installation is tempting. With the abundance of online tutorials and step-by-step guides, it's easier than ever to attempt installing a garage door yourself. 


Here are some factors to consider before going the DIY route.

Factors to Consider Before Opting for DIY Installation of a Modern Garage Door

Cost Savings

DIY installation can save you a significant amount of money on labor costs. However, it's essential to weigh these savings against the potential risks and challenges involved.

Flexibility and Convenience

DIY installation allows you to work at your own speed and time without having to wait for professional installers to arrive. This flexibility may be especially enticing to individuals who lead hectic lives.

Learning Experience

Installing a garage door can be a rewarding learning experience, providing a sense of accomplishment and a deeper understanding of your home's mechanics.

Professional Installation

While DIY installation offers certain advantages, there are compelling reasons to consider hiring professionals for the job:

Benefits of Hiring a Professional for Modern Garage Door Installation

Expertise & Experience

Professional garage door installers have the knowledge, skills, and experience to install your modern garage door correctly and safely. They can navigate potential challenges and complications more efficiently than inexperienced DIYers.

Warranty & Guarantee

Many reputable garage door companies offer warranties and guarantees on both the product and installation services. This provides peace of mind, knowing that you're covered in case of any issues or malfunctions.

Time & Efficiency

Professional garage door installers have access to specialized tools and equipment, allowing them to complete the installation process quickly and efficiently. This means less disruption to your daily routine and faster enjoyment of your new garage door.

Safety Considerations

Garage door installation can be hazardous, involving heavy lifting and working with mechanical components. Professional installers are trained to prioritize safety and minimize the risk of accidents or injuries.

Making the Right Choice

When deciding between DIY and professional installation for your modern garage door, it's essential to consider your own skills, experience, and comfort level with home improvement projects. While DIY installation may be suitable for those with the necessary expertise and confidence, others may prefer the peace of mind and assurance that comes with hiring professionals.

Ultimately, the most important factor is ensuring that your modern garage door is installed correctly and functions properly for years to come. Whether you choose to tackle the installation yourself or enlist the help of professionals, investing in quality craftsmanship and reliable service is key to maximizing the value and performance of your garage door.

Contact Door Doctor for Modern Garage Door Installation Today!

At Door Doctor, we understand the importance of a modern functioning garage door, especially considering Canada’s unique repair challenges. Our experienced technicians are here to handle all your garage door repair needs.

With years of experience, specialized tools, and a commitment to safety, we can diagnose and fix your garage door problems the right way. 

Contact us today for a free consultation!

Can You Paint a Roll-Up Garage Door

Can You Paint a Roll-Up Garage Door & Breathe New Life into Your Garage?

One of the main external features of your house is your roll-up garage door. Over time, environmental factorscan wear it down, causing it to appear faded, damaged, or even rusty. Giving your garage door a fresh coat of paint can instantly boost its curb appeal. 

But is painting a roll-up garage door a DIY project, or is it best left to the professionals?

The good news is that you can paint a roll-up garage door yourself, as long as you're comfortable with some basic home improvement tasks. Here's a comprehensive guide to help you navigate this project:

Choosing the Right Paint

Not all paints are created equal, especially for external use. Here are important things to consider when selecting paint for your roll-up garage door:

  • Material: Roll-up garage doors can be made from steel, aluminum, wood, or fiberglass. Ensure you choose a paint specifically designed for your door's material to ensure proper adhesion and durability.
  • Durability: Opt for exterior-grade paint that withstands harsh weather conditions like rain, snow, and UV rays. Look for paints labeled with "weatherproof" or "all-weather."
  • Finish: Consider the desired finish – flat, satin, or semi-gloss. Flat finishes hide imperfections well but may show dirt more easily. Satin and semi-gloss finishes offer a nice balance between aesthetics and easy cleaning.

Preparing the Roll-Up Garage Door

Proper preparation is crucial for a successful paint job. Here's what you need to do:

  • Gather your supplies: You'll need drop cloths, painter's tape, cleaning rags, a degreaser, sandpaper, a paintbrush, a roller with a nap suitable for your chosen paint, a putty knife (for minor repairs), and, of course, the paint and primer.
  • Clear the workspace: Remove any obstacles around the garage door and ensure enough space to work comfortably.
  • Clean the door thoroughly: Use a degreaser to remove dirt, grime, and oil buildup. Rinse well and let the door dry completely.
  • Address imperfections: Fill minor dents or scratches with a suitable patching compound and sand smooth once dry.

Applying Primer & Paint

  • Now comes the fun part – painting!Apply primer: Primer produces a smoother surface and improves paint adhesion. Select a primer that works well with both the roll-up garage door's material and the paint you've chosen. Using a brush for finely detailed parts and a roller for broader portions, apply a thin, uniform layer of primer. Follow the manufacturer's directions and let the primer dry fully.
  • Painting the door: After the primer dries, it's time to paint! Once again, start with a light layer and use your brush and roller to apply even strokes. Pay close attention to corners and edges. Allow the previous coat to dry completely before applying the next. Aim for two or three coats of paint for the best effects.

Safety Tips

  • Work in a well-ventilated area: Wear a mask and gloves when using paint and primer.
  • Protect your surroundings: Use drop cloths to shield your driveway and surrounding areas from paint splatters.
  • Be mindful of the weather: Avoid painting on  windy or wet day. For optimal drying conditions, choose a day with low humidity and moderate temperatures.

Considering Professional Help

While painting a roll-up garage door is doable as a DIY project, there are situations where hiring a professional might be a better option:

  • Large or complex doors: Large commercial garage doors or those with intricate designs may be more challenging to tackle on your own.
  • Safety concerns: If you're uncomfortable working on a ladder or with power tools like a paint sprayer, consider hiring a professional.
  • Extensive damage: Significant rust, dents, or warping on your garage door? An expert can evaluate the damage and recommend the best course of action.

Conclusion

Painting your roll-up garage door is a cost-effective way to enhance your home's curb appeal and add value. With proper planning, preparation, and the right tools, you can achieve a professional-looking finish.

However, if the project seems daunting or you have any safety concerns, seek help from the qualified garage door professionals of Door Doctor.


Contact us today!

How to Install a Roll-Up Garage Door

How to Install a Roll-Up Garage Door?

Looking to improve your garage's functionality and aesthetics? 

A roll-up garage door is a perfect solution. 

Not only are they sleek and space-saving, but they also offer smooth operation and increased security. While professional installation is always an option, knowing how to install a roll-up garage door yourself is a rewarding and cost-effective project for the handy homeowner.

Tools Required to Install Roll-Up Garage Door

Before you begin, ensure you have all the necessary tools and materials:

  • Roll-up garage door kit
  • Measuring tape
  • Level
  • Drill
  • Screwdriver
  • Hammer
  • Wrench
  • Ladder

Steps to Install Roll-Up Garage Door

Step 1: Preparation is Key

Before you dive into installation, ensure a smooth process by checking your garage door opening:

  • Measure Up: Match the door size to the opening's measurements. Don't skip this crucial step!
  • Level Check: Grab a level and ensure both the top (head) and bottom (jamb) of the opening are level.
  • Plumb Jambs: Verify that the door jambs (vertical sides) are perfectly plumb (straight up and down).
  • Track Alignment: Make sure the existing track (if present) sits flush with the opening.
  • Gather the Troops: Double-check that you have all the installation parts before you begin.

Step 2: Getting Organized

Now that you're prepped, let's get the door and parts ready for installation:

  • Clean Sweep: Give the floor a good cleaning to avoid scratches or damage to the door curtain (panels).
  • Track Time: Place the left track upright on the floor, positioned perpendicular to the opening. The track bottom should be against the left jamb, with the inside top flush against the building. Repeat this process for the right side.
  • Hardware at the Ready: Lay out all the hardware on their respective sides for easy access during installation.

Step 3: Securing the Brackets

The brackets hold the door panels in place, so ensure a secure fit:

  • Bracket Orientation: Position the bracket with the shorter side facing upwards.
  • Tensioner Pawl Clearance: Make sure the tensioner pawl (locking mechanism) doesn't obstruct the ratchet wheel.
  • Track and Bracket Alignment: Align the track and bracket so the hooks can be inserted with ease.
  • Locking It In: Fit the bracket and track together until the locking tab clicks securely into the notch on the bracket.

Step 4: Lifting the Assembly

With the brackets and tracks secured, it's time to raise the door assembly:

  • Two Hands are Better: This step requires two people for the safe and proper installation (or replacement) of the door.
  • Track Placement: Ensure the bottom tracks are resting face-up towards the door jambs.
  • Pivot and Raise: Carefully pivot the assembly around the jambs as you lift it into position.

Step 5: Fastening the Tracks

Now that the assembly is in place, let's secure the tracks and brackets to the jambs:

  • Level Up: Double-check the position of the tracks and brackets with a level for accuracy.
  • Fastener Frenzy: Use appropriate fasteners to attach brackets and tracks securely.
  • Bracket Spacing: Maintain at least a one-inch gap between the front and back of the brackets.
  • Bracket Centering: Ensure the brackets are centered on the jambs for a balanced look.
  • Material Matters: The fastener type depends on your jamb material. Refer to the table below for specific recommendations (steel, concrete, wood).

Material

Fasteners

Drill Size

Steel

1/4 inch by 1-inch TEKS Screw

No drilling necessary

Concrete/filled block

1/4 inch by 1-3/4 inch Powers Wedge-Bolt

Powers 01314

Wood

1/4 inch by 1-inch Lag Screw

No drilling necessary

Step 6: Spring Time

With the door panels secured on the brackets, let's adjust the spring tension:

  • Spring Rotation: Rotate the spring to achieve proper tension, typically around 1.5 revolutions.
  • Rotation Direction: Rotate the spring in the direction that allows the door to move downwards through the bottom tracks.

Step 7: Stopping the Door

The head stop prevents the door from hitting the casing too hard when open. Let's attach it:

  • Head Stop Release: Release the head stop from inside each track.
  • Securing the Stop: Use a hex screw to secure the head stop firmly to the track.

Step 8: Finishing Touches

These final steps ensure a functional and user-friendly door:

  • Stop clip installation: Attach a stop clip using a carriage bolt and nut at the bottom of each bar.
  • Handle installation: Mount the handles on the outside bottom bar using carriage bolts and nuts.
  • Rope installation: Thread the rope through the center hole of the bottom bar angle.

Call the Professionals for Roll-Up Garage Door Installation

While DIY garage door installation is possible, hiring the professionals of Door Doctor is generally recommended to ensure it's done correctly and safely. 

Contact us today if you're looking for garage door repair in Ottawa, Montreal, Kingston, or Toronto/Brampton.

How Does a Roll-Up Garage Door Work

How Does a Roll-Up Garage Door Work?

Roll-up garage doors are common in homes, businesses, and industrial settings. They offer a space-saving design, ease of operation, and durability. 

But have you ever wondered how these seemingly simple doors function? This blog post will unveil the inner workings of a roll-up garage door, exploring its components and the mechanics behind its operation.

Essential Parts of Roll-Up Garage Door

A roll-up garage door consists of several key parts that work together seamlessly:

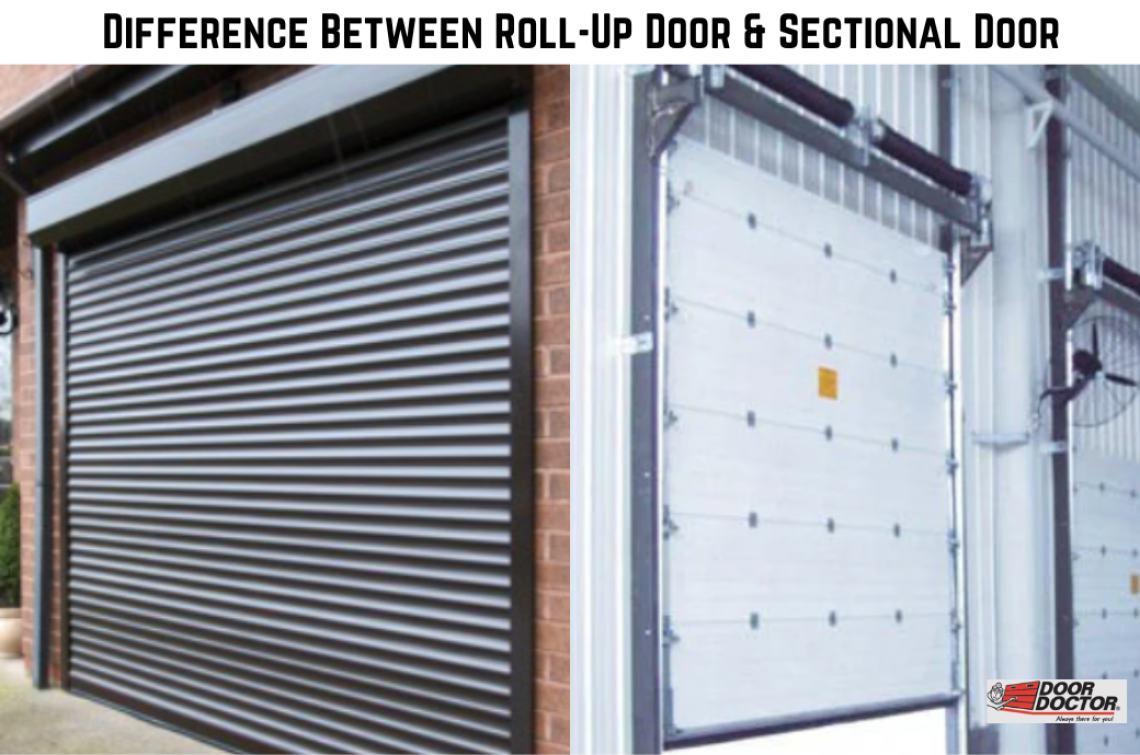
  • Door Slats: These horizontal interlocking slats, typically made of galvanized steel or aluminum, form the main body of the door. They are lightweight yet strong, allowing for smooth rolling.
  • Bottom Rail: This sturdy metal piece acts as the door's leading edge, guiding it along the tracks during operation.
  • Side Tracks: These vertical tracks, mounted on either side of the door opening, provide the pathway for the door to travel up and down.
  • Drum: Located at the top of the door frame, this cylindrical barrel houses the coiled door slats when the door is open.
  • Spring System: A torsion spring, typically located above the drum, counterbalances the door's weight, making it easier to open and close.
  • Motor (Optional): Many rollup garage doors are equipped with electric motors for automatic operation. These motors connect to the drum or shaft, allowing for remote control opening and closing.
  • Control Panel (Optional): This keypad or remote control unit transmits signals to the motor, triggering the door's operation.

How a Roll-Up Garage Door Works

Let's dissect how a roll-up garage door works:

Opening Sequence

  1. Activation: The process initiates when you trigger the opening mechanism, whether manual or electric.
  2. Drum Rotation: This action prompts the drum, linked to the slats, to rotate.
  3. Slats Ascend: As the drum rotates, the slats disengage from the bottom track and begin their vertical ascent.
  4. Coiling: Guided by the track system, the slats continue rising until they fully coil around the drum at the top of the opening.

Closing Procedure

  1. Reversal: To close the roll-up garage door, the sequence reverses.
  2. Motor Reversal or Manual Force: The motor reverses its direction, or manual force is applied in the downward direction.
  3. Drum Reversal: Consequently, the drum rotates in the opposite direction, causing the slats to unwind.
  4. Vertical Descent: Guided by the tracks, the slats descend vertically, interlocking as they go down.
  5. Securing Closure: Once fully lowered, the bottom slat re-engages with the track, ensuring a secure closed position.

Safety Features of Roll-Up Garage Door

Modern roll-up garage doors incorporate several safety features:

  • Auto-Reverse Mechanism: This feature ensures the door automatically reverses its direction if it encounters an obstruction while closing, preventing injuries or damage.
  • Bottom Bracket Safety Sensor: This sensor detects objects beneath the closing door, triggering a reversal to prevent crushing accidents.
  • Emergency Release Cord: This allows manual door opening in case of a power outage or motor malfunction.

Conclusion

By understanding the components and how does a roll-up garage door works, you gain a deeper appreciation for its functionality and safety features. This knowledge can also empower you to make informed decisions regarding maintenance, repairs, and potential upgrades for your roll-up garage door system.

Contact Door Doctor today to learn more about roll-up garage door and to get one for your home or office!

torsion spring vs extension spring

Torsion Spring vs Extension Spring | Which is Better for Your Garage Door?

When it comes to garage door repairs or replacements, choosing the right type of spring is crucial for smooth operation and longevity. 

Torsion and extension springs are the two primary options, each with unique characteristics and advantages. Understanding the differences between them can help you make an informed decision about which one is better suited for your needs.

What are Torsion Springs?

Torsion springs, positioned horizontally above the garage door, store energy as they twist when the door closes and then release it as the door opens. This setup ensures a smoother and more controlled operation compared to extension springs. 

Notably, torsion springs boast superior durability and longevity over extension springs, making them a cost-effective option. Moreover, their parallel installation to the door tracks enhances safety by minimizing the risk of accidents or injuries.

What are Extension Springs?

Extension springs, positioned vertically on either side of the garage door, elongate and contract to aid the door's movement. Though simpler to install, they demand more upkeep than torsion springs. Despite being cost-effective, extension springs are vulnerable to wear and tear due to exposure, necessitating more frequent replacements.

Torsion Spring Vs Extension Spring

Feature

Torsion Spring

Extension Spring

Operation

Turns on a shaft

Expands and contracts

Extension

Partially extended

Fully extended

Durability

Sturdier, lasts longer (15,000-20,000 cycles)

Less sturdy, shorter lifespan (up to 10,000 cycles)

Motion

Controlled

Jerky

Adjustment

Less prone to needing adjustments

More prone to needing adjustments

Complexity

Less complex, fewer parts

More complex, more parts (sheaves, cables)

Maintenance

Easier to lubricate and maintain

More wear and tear on additional parts

Operator Wear

Less wear on the operator

More wear on the operator

Safety

Safer when it breaks (stays on the shaft)

More dangerous when it breaks (it can fly off)

Cost

More expensive

Less expensive

Which One is Better? — Torsion Spring Vs Extension Spring

While both types have their merits, torsion springs generally emerge as the victor due to their safety, durability, and quieter operation. However, there can be cases where extension springs make sense:

  • Tight budget: Extension springs offer a more affordable option if cost is a primary concern.
  • Limited headroom: Extension springs might be your only choice if space above the door is restricted.
  • DIY repairs: If you're comfortable with repairs, the simpler spring replacements of extension springs might appeal to you.

Conclusion

Consulting a professional garage door technician, such as Door Doctor, is always recommended to assess your specific needs and suggest the best spring system. They can also handle safe installation and ensure your door operates smoothly and safely for years.

Contact Door Doctor today to learn more about what’s better for your garage door. 

English