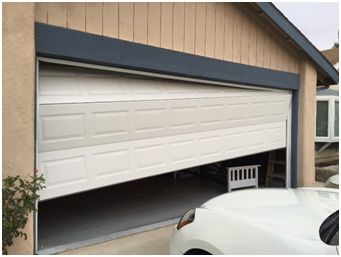
Check Out How to Install Garage Door Cables
If you’re wondering how to install garage door cables, you’re probably worried about a costly repair or replacement.
However, if you are able to identify your broken garage door cable, you can perform the installation yourself!
You must make sure that your garage door is safe for you and your family sooner rather than later. This article can help you figure out where to start.
If you want to find out how to install garage door cables, read on for the seven steps to a successful job!
How Does a Garage Door Cable Work?
Your garage door cable keeps you safe if a spring on the garage door breaks. Torsion spring cables connect the bottom of the garage door to the cable drum so the springs can lift the door. With regular use, the springs can get worn out or frayed.
When Should You Replace a Garage Door Cable?
If you’re wondering if you need a new garage door cable, begin by determining the current state of the cable itself. You should check it once a year and replace it if you see any damage.
The most common damage is rusting, broken or separated wires, frayed wires, and oxidation. If you notice these signs of damage, installing a new cable is the best option.
Tools and Materials RequiredBefore starting the job, you should have the following tools to keep you safe. They can easily be ordered or obtained at your local hardware store.
- Garage door replacement cable
- Leather work gloves
- Safety glasses
- Ladder or stepladder
- Wrenches
- Vice grip or locking pliers
- Rags
- Winding bars
- Ratchet
- Sockets
Steps for Installing Garage Door Cables
1. Open the Door
Pull down the emergency release so you can open and close your garage door manually. The emergency release is usually a red rope with or without a handle near the opener or the top rail.
Open the garage door and use a vice grip below the roller on both sides to hold the door open.
2. Release Spring Tension
Loosen the spring screw sets at the centre of your garage door with ¼ turns. After that, fully insert both winding bars. Use both bars at the same time to avoid injury and do not get in the way of the bars.
Completely unwind the garage door spring in ¼ increments until you release all the tension. Do this individually for every spring on your garage door.
3. Loosen Cable Drum Screws
Once you release the tension, use the wrench to loosen the screws in the cable drum at the top left of your garage door. Then remove the cable. Near the bottom of the door, use your socket and ratchet to remove the bottom screw from the jamb bracket. Remove the bottom bracket and then the cable.
4. Insert New Cable
Next, insert the new cable into the bottom bracket, then thread it to the drum at the top of the garage door. Repeat for the other side of your door.
5. Set the Cable
Insert the cable into the slot in the cable drum. Make sure it’s accurately set and doesn’t overlap. Wind the cable onto the drum, slide the drum to the bearing plate and turn it counterclockwise until the cable is tight.
Tighten all screws once the cable is set on both sides. Do not over-tighten the screws, as it could strip them.
6. Increase Spring Tension
While holding the new cable, use your vice grip to hold the rod that intersects the garage door in place against the wall. Repeat on the other side.
Then, use the winding bars to increase spring tension by ¼ turns. Do not overwind the springs.
7. Finish Up
Remove the locking pliers from the metal rod at the top of the door and re-engage the door by pulling the emergency release. Lift the door until it clicks into place. You can now plug in your garage door opener.
How to Install Garage Door Cables with Door Doctor
Despite these step-by-step instructions on how to install garage door cables, it can still be tricky to follow every step perfectly. Contact us for 24-hour, fast, and friendly garage door service.
Our professionals at Door Doctor carry the cables commonly used in garage doors across the country! We quickly identify the problem and repair your garage door as quickly as possible.


